Introduction
A few weeks ago, one of my hosting provider's servers went belly-up. So down went a client site, their email and a couple of my email domains and sites. Nothing monumental from my side - a company holding page and my blog. This blog (or the WordPress version of it anyway).
Truth is, I've been procrastinating over moving away from the provider for some time. For a while, very few months they would let a certificate expire somewhere which would mean either no email or no website. At the start their advice was "just ignore the certificate warning". No, thank you, and not advice I'm passing along to a client.
So this is the story of how I shifted all the "stuff" from a traditional hosting provider to elsewhere on the web (for as little monetary expense as possible).
Client email
This was the first thing I needed to move. Again I'd been meaning to speak to them about moving to Google or Microsoft for their email and hadn't got round to it. I needed an immediate fix though. Enter Cloudflare. The client's website has been sitting happily behind a Cloudflare proxy for some time along with a few other and I've noticed the "Email" option on the dashboard but not given it much though. Put simply, you can configure your Cloudflare domain to forward all emails sent to a given address (and you can include a catch-all filter) to be redirected to another address.
Before starting it's worth pointing out that the domain I'm using here is already managed by Cloudflare.
Log in to Cloudflare, select your chosen domain and click on the Email item in the left hand menu.
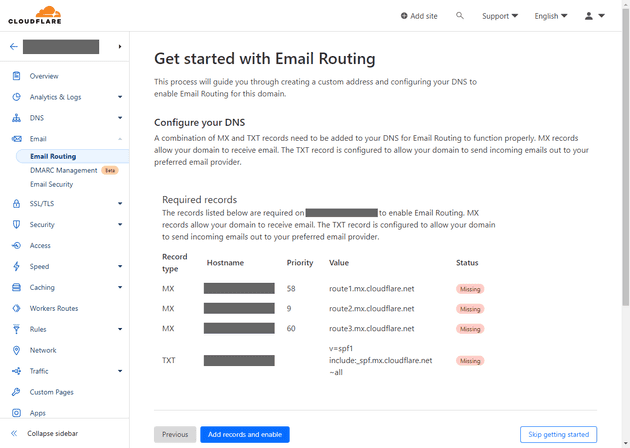
Helpfully this page tells you what DNS records are required to get this working. Even more helpfully you can just click the "Add records and enable" button and have them added.
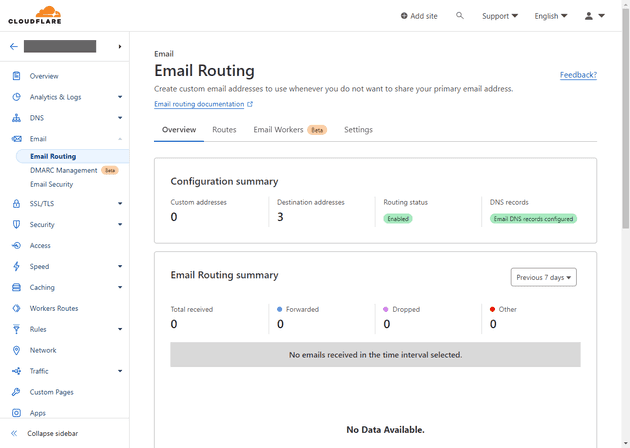
After a few seconds the page should look like below telling you that routing is enabled and the DNS records are configured.
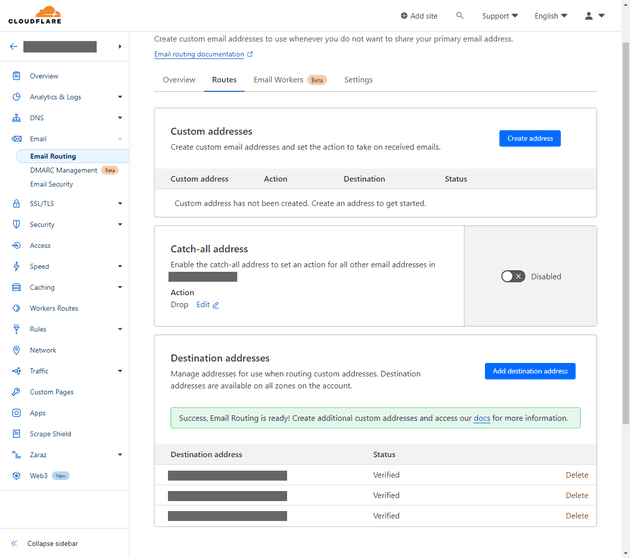
The next thing to do is set up the email routes, click the Routes tab. Here, you'll need to set up a destination address. In the next screenshot I've already got some created and will be re-using one of those. To create a new destination click the "Add destination address" button, enter the address click "Save" and then follow the instructions to verify the address.
When the address has been verified you can either add (or create) an address on your Cloudflare domain, add a catch-all filter or do both.
To add a specific address click the "Create address" button, enter the appropriate details and click "Save".
To add the catch-all filter, toggle the switch to enable it, click "Edit", select "Send to an email" and then pick your destination address from the list. Note that you also have the option to drop the email or send it to a Cloudflare worker. Click the "Save" button and you're good to go.
Client web site
This was the second thing I needed to move. The existing site was an Umbraco install which, although ancient, was running perfectly fine. That said, the website hadn't been updated in some time and was pretty tiny in size so given Umbraco's reliance on SQL Server (in a self-hosted install) I wasn't keen on rushing into a replacement Umbraco install. So, what are the options:
- Umbraco Cloud - starting at £32/month it's a bit steep for the size of this site. A no.
- WordPress Hosted - technically starting from free but if you need a custom domain £3/month. I could live with spending that amount but did I really want the headache of migration an Umbraco site to WordPress. I did not.
- WordPress Self-hosted (what this blog use to run on). Given recent experience I'm looking to move away from my hosting provider so I'd need to either find another one or look at hosting it in Azure. Could be done but again the custom domain means I'm forced into a paid Azure plan (plus the same migration headache). Another no.
- Static Pages - I know, I'm a bit late to the party with this. Been around for a few years now but I've never really had any reason to look into them in detail. Now's my chance then.
There are a ton of providers out the that host a static site (including all the biggies) but when delving into something new I like some degree of familiarity, so it came down to Cloudflare Pages and Azure Static Web Apps. Toss of a coin really but I went with Azure for this one.
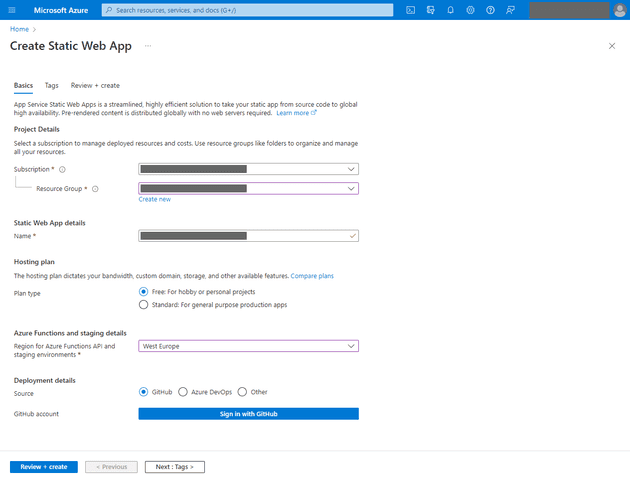
Log in to your Azure Portal and go through the options to create a new Static Web App resource.
Choose your subscription and resource group. Next enter a name for your web app. Note that this doesn't form part of the public URL for the site.
Pick your plan and Azure region. Finally select where you're going to get your website code from
Now, most static websites are typically generated from source into static assets using something like Hugo or Gatsby. Not this one though, this is a "static" static web app. HTML, CSS and images. Not even a hint of JavaScript.
However, regardless of that, select your source and enter any details if required. For me, the code is in GitHub so I'm clicking the "Sign in with GitHub" button and authorizing Azure access to the repos.
Once authorized, fill in the required information:
- Organization
- Repository
- Branch
Then select from the Build Presets drop down list. There's a good selection here to pick from but I only need plain HTML, and my app location and output location are the same thing.
Click "Review + Create", then "Create" to spin up the resource. Once the deployment has completed click "Go to resource".
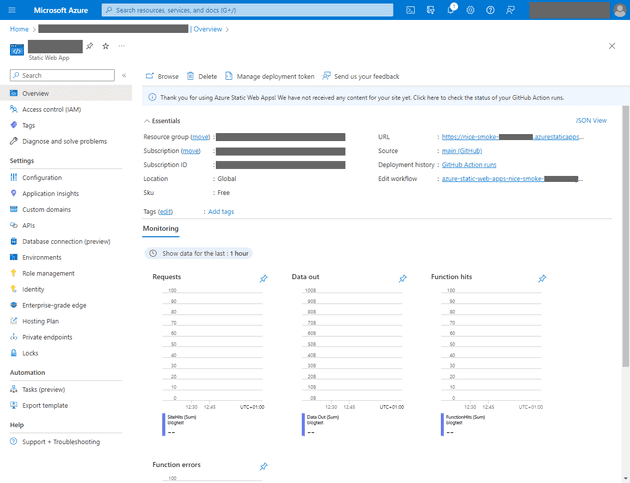
Initially, you'll see the light blue info bar stating "We have not received any content for your site yet. Click here to check the status of your GitHub Action runs". If you click this you should be taken to your GitHub repo where you can choose to run the workflow. In my case, by the time I had clicked on the link, the workflow had completed. Once it has you can click on the URL for your site (the one beginning https://nice-smoke- in the screenshot).
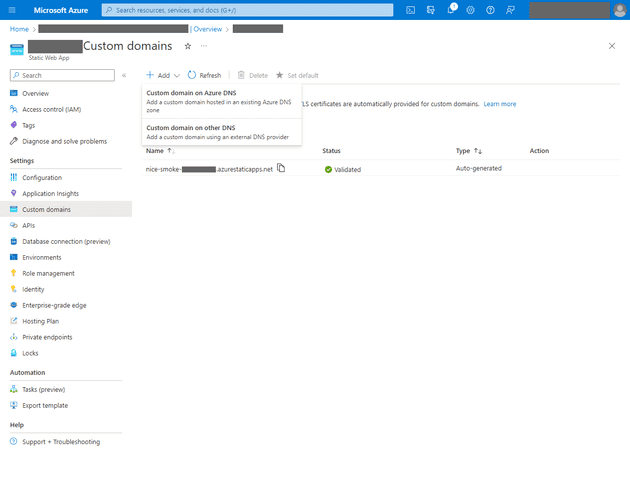
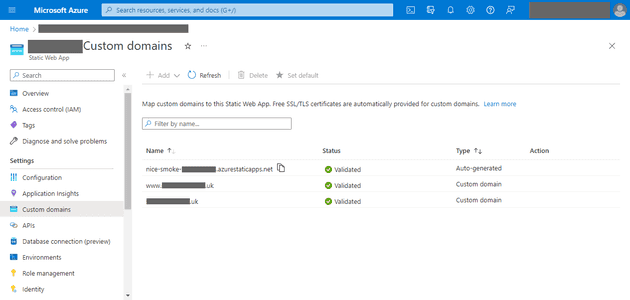
As lovely at that URL is you'll probably want to set up your own custom domain(s) on the app. Click on the Custom domains item in the left hand menu.
The free plan allows you to add two custom domain names to the static web app. Click on the + Add button in the toolbar and select the relevant option for you. I'm using Cloudflare for my DNS so I'm selecting "Custom domain on other DNS".
In the flyout enter the custom domain that you want to use and click "Next".
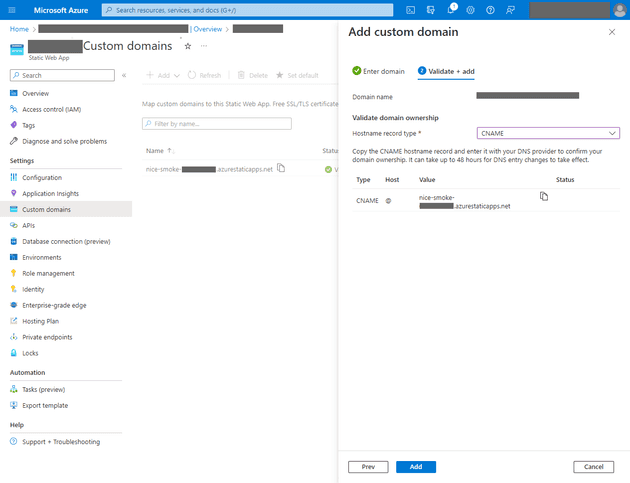
You've now got two options, use a TXT record or a CNAME record. I'm choosing CNAME for my situation. Note that you're not able, at time of writing, to use the CNAME option with an apex domain (e.g. example.com) off the bat but you are with a sub-domain (e.g. www.example.com).
To use an apex domain you need to use the TXT option, click the "Generate" button and then copy the generated value into a new TXT record in your DNS provider's configuration. The status will sit at validating for quite a bit longer than the CNAME method before it validates. Once it does it will tell you to go and add and ALIAS, CNAME or A record in your DNS provider's configuration. Once you've done this it should completely validate shortly afterwards.
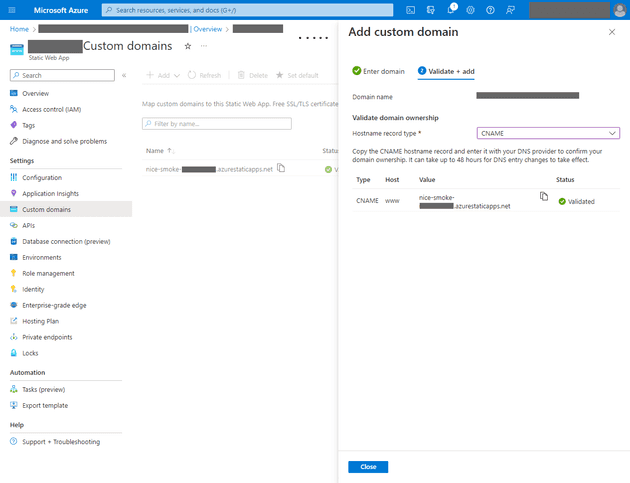
Click the "copy" icon here and then enter that value as a CNAME record in you DNS provider's configuration. Note that if you're using Cloudflare then don't proxy the DNS entry as it won't validate in Azure. Once you've done this you can click the "Add" button. If the config hasn't propagated enough you might see a "CNAME record is invalid" error. If you do try again in a few minutes.
Once validated click the "Close" button. Your custom URL should now show up in the list.
Company email
Microsoft 365. I feel like I'd made that decision some time ago and just never got around to it. You can get the basic package for around 5£/month but I opted for the next level up (the one with the desktop apps) for about 10£/month, but because the Microsoft website was a bit broken when I tries to sign up they gave me 3 months for free instead of the standard 1. I'm sure they probably do that quite often though.
Setup was remarkably straightforward and I wish I'd taken notes and screenshots during the process but I wasn't sure at the time I would write this up as a blog post. It went somewhere along the lines of this though.
I logged in to the M365 admin centre, click Settings > Domains in the left hand menu and added my custom domain. From memory I didn't have to manually create the DNS records with Cloudflare, that was done automatically either as part of this process or during the process of setting up the new account in Outlook.
The next (and last) step was to download and install Outlook then add a new account with the domain added above. It really was very simple.
Company holding page
Having chosen an Azure Static Web App for the client web site I decided to see what Cloudflare pages offered.
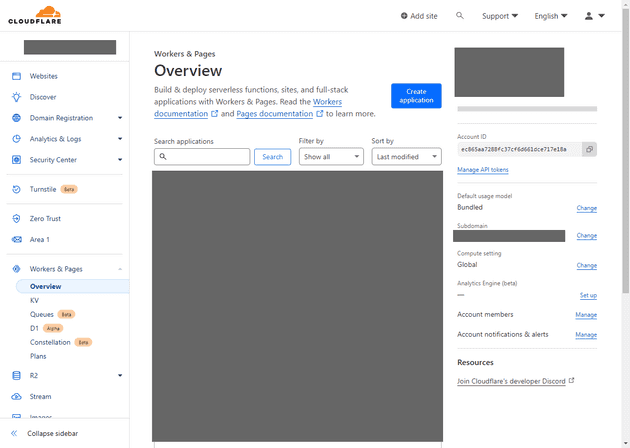
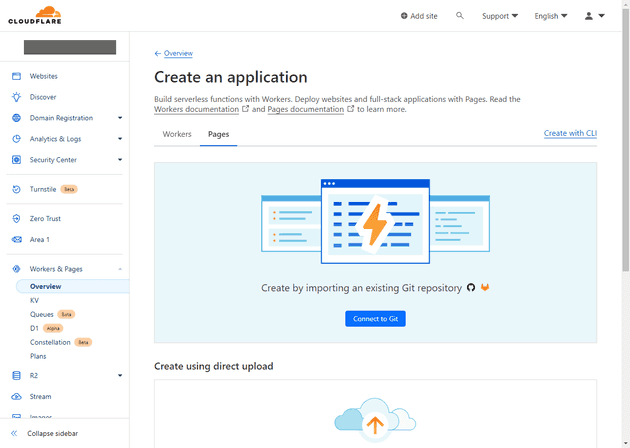
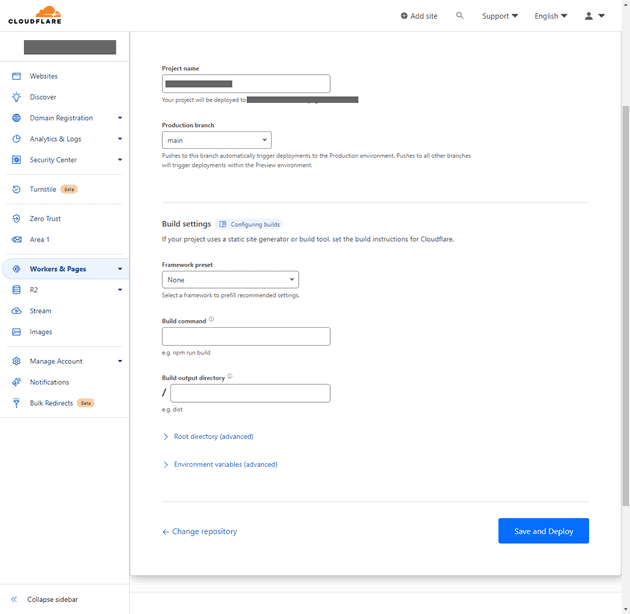
Log in to your Cloudflare dashboard and select Workers & Pages from the left hand menu and click the Create application button. On the Create and application page click the Page tab and the Connect to Git (assuming that's where your site is coming from). You also have the option of a direct upload.
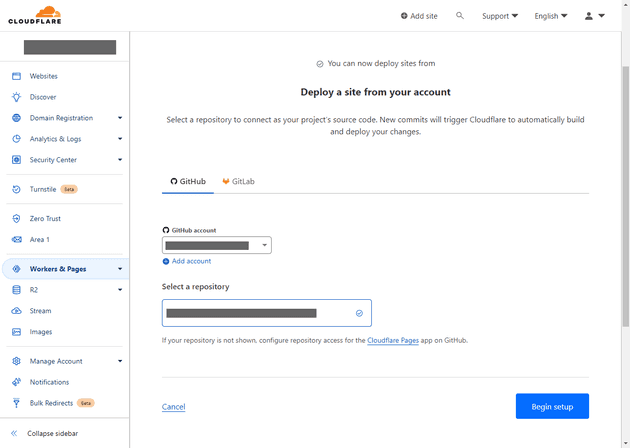
Once you click the button you need to choose between GitHub and GitLab. My site is in GitHub so I select that tab and enter the relevant details to authorize Cloudflare with GitHub. You can select an entire account or individual repos as part of this step.
Once connect you can select the account and repository and click the Begin setup button.
For this holding page I have no build framework in play - so I just select "None" and leave the Build command and Build output directory blank. Click the Save and Deploy button.
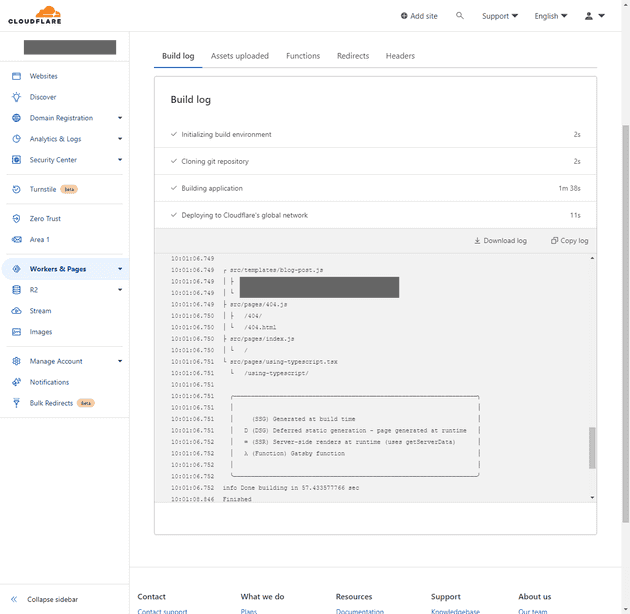
It takes a little while but you should it progressing through cloning the repo and deploying to the Cloudflare network.
Personal email
Some years ago I configured a mail server on a "personal" domain name. I then started dishing out custom email addresses, so any time I signed up for something I'd be using a unique email address ([email protected]) and also it would be evident who was to blame if that address started receiving spam. In truth I've had very little spam to any of the 100 or so addresses that were set up in close to 7 years, not sure it was worth the effort.
However, those addresses are out in the wild now and I really need to keep a lot of them. I could I believe added the domain to my M365 account and set it up in Outlook but I like the separation of business and personal stuff, so I decided to go back to the Cloudflare Email option and just redirect to my "actual" person email address. Just followed the same process as above and used a catch-all filter rather than explicitly list all the custom addresses I had created.
Personal blog
I almost didn't bother with this - but I'm glad I did. I've not really had either the inclination or the time to devote to this blog for a good few years now so I wasn't sure whether to bother trying to resurrect it. But I thought I would treat it as an exercise in migrating from WordPress to some kind of JavaScript framework - and document the process as this blog post.
Having moved the holding page to Cloudflare pages above and noticed the option for Gatsby in the list of build frameworks I decided to go for that. No real reason, was probably between Gatsby and Hugo - seemed like maybe the Gatsby starter templates were more appealing to me. Simple, like me.
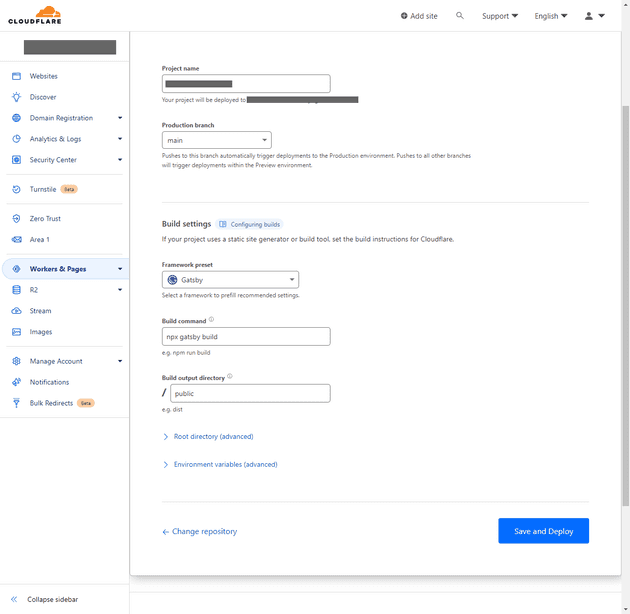
So I followed the same process above to create an application through the Cloudflare dashboard and this time choosing Gatsby as the build framework, leaving the other options at their default values.
Click the Save and Deploy button. As above it takes a little while but you should it progressing through cloning the repo, building the application and deploying.
Except it didn't.
npm ERR! `npm ci` can only install packages when your package.json and package-lock.json or npm-shrinkwrap.json are in sync. Please update your lock file with `npm install` before continuing.At least the error message was sensible. I did indeed run the npm install command locally and committed those to GitHub.
I re-tried the deployment and this time, success!
The last thing to do was set up the custom domains on the site. By default you get a ".pages.dev" domain but I've got an existing domain name that I want to port over.
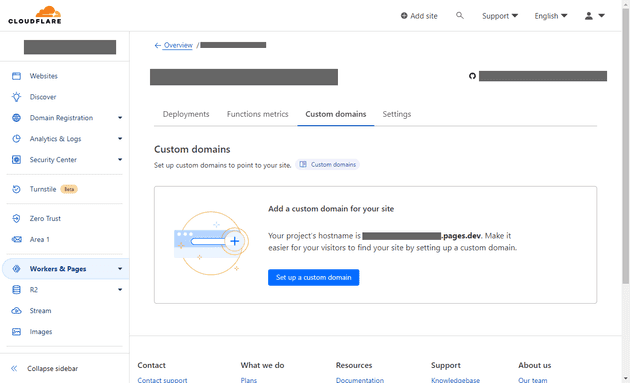
Go back to your Workers & Pages overview page, selected the Pages application that you just created and then click the Custom domains tab.
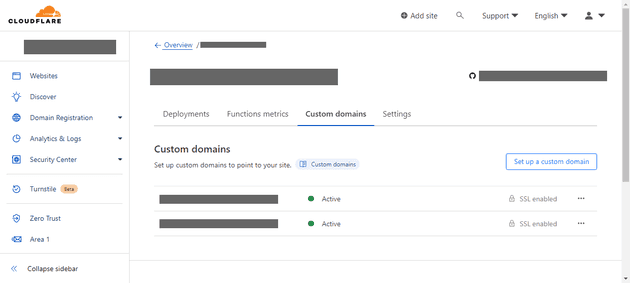
On that page click the Set up a custom domain button. Enter you custom domain name in the box and click the Continue button.
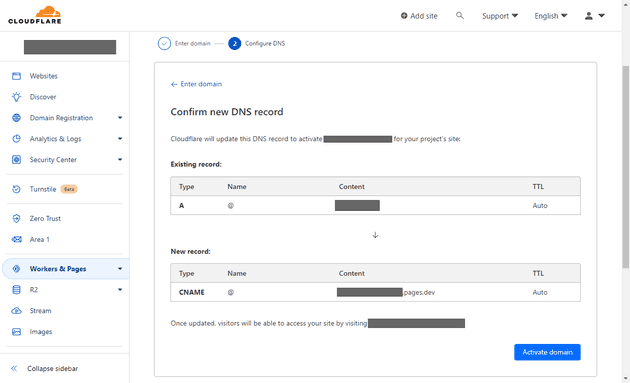
The next page should tell you which records will be updated - assuming you're also using Cloudflare for your DNS. If not I suspect you'll need to go and add those records manually.
Click the Activate domain button. You should be redirected to a page telling you that the domain is verifying. After a while they should show as verified and you're site will be available at those addresses.
